


Is it Mold or Are They Root Hairs?

The most frequently asked question for a new microgreen farmer is, “is this mold or root hairs?” I found myself asking that same question yesterday when I started the morning watering. Mold and root hairs both look fuzzy and can easily be mistaken one for the other. Healthy root hairs are white but molds usually can be defined by a color, and can be from light gray, or pink/red, or black. My fuzz looked white, but more of an off white, almost a light gray. It wasn’t the bright white of healthy roots. I wish my teeth were that white!
So another question that ran through my proverbial checklist, was the location of the fuzz, since that is a good indicator of what it is, root hair or mold. Root hairs will ONLY be on the new root or radicle as they emerge from the seed during the germination period, especially if the seeds are kept in blackout. These “hairs” are the tiniest roots that are searching for moisture and soil or medium.
Mold can show up anywhere; the medium, the roots, the stems and even the leaves. Usually mold grows lower in the tray under the canopy of the plants, where more moisture gets trapped and less light gets to it. This is especially true if you are watering from above the plant and getting the leaves wet. A two tray system as explained below will allow for bottom watering and avoid excess moisture on the leaves.
Comparisons – Root Hairs or Mold?

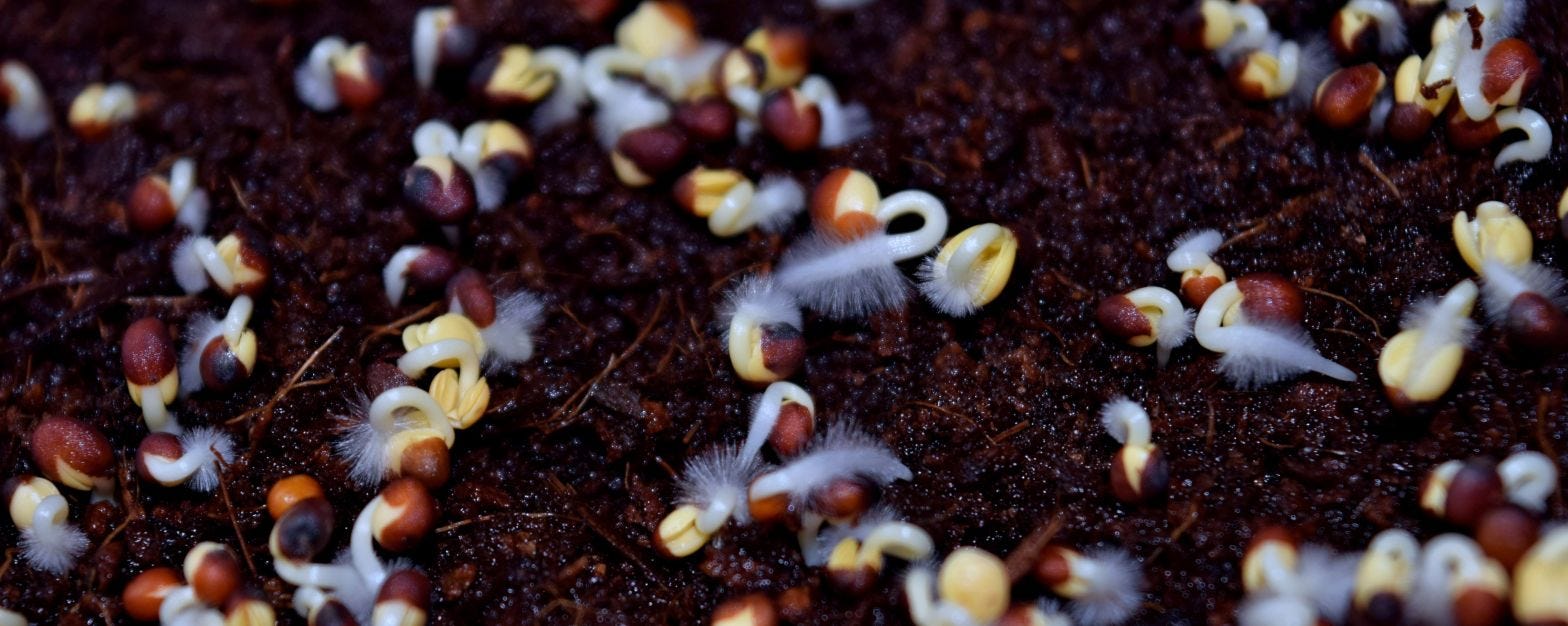
These are broccoli seeds that are about two days into the germination phase and still under weights and in blackout. The fuzzy areas are ONLY on the radicle (new root) portion and NOT on the coco coir. These are root hairs and are NOT mold.
This morning I found my new tray of Brussel Sprouts had mold. They had only been in the light for about the third day and just starting to green up and open up it’s leaves. The grayish white fuzzy stuff is like a spider web after a heavy dew, often on the growing medium or the base of the plants. When I cleaned it out of the tray it felt slimy in my hand (yuck!) when I removed it and treated the area. (See below).
Treatment
I pulled the entire area affected by the mold growth. Then I removed all the slimy roots, plants or medium from the area. I went all the way down to the tray (mine is a pink shallow tray), the ones with holes. Mine are from Bootstrap Farmer. Immediately remove the debris from your grow room and out of the building. Spray the plants around the bald area with a food grade 3% hydrogen peroxide mixed in water. Be liberal with spraying the affected area and mist the entire tray lightly. Be frugal with any other watering (half the normal amount) for the immediate feeding and monitor the watering at this reduced amount and only increase when you see evidence that your bottom tray or growing medium is dry or plants are wilting. Moisture should be kept to a minimum, but don’t let plants die. Fans should be kept on 24 hours and proper drainage maintained.
Growing Habits
I use a two tray system, one upper tray with drainage holes and a solid bottom tray to allow for bottom watering. I use the microgreen shallow trays from Bootstrap Farmer which are 1″ deep and very durable. I love their colorful trays!
For this tray I used a coco coir medium from Planetix, Coco Bliss bricks. I make every effort to use bricks so I can use all rehydrated coco coir to plant enough trays so there isn’t any medium leftover in the plastic storage container I use. I keep it covered with a lid to keep my pets out of trouble.
I use my well water, straight from the tap which is a pH of 6.2 and close enough for growing microgreens and most vegetables and herbs. I don’t make any pH adjustments. My bottom water is mixed with Ocean Solution (2-0-3). I water twice daily each tray from the bottom once the plants go under the lights.
During the blackout period I spray a fine mist of tap water on the seeds twice daily. I don’t use any nutrients during germination since all the nutrients at this point in time is coming from the seed.
Once germination is completed and the root hairs develop the new plant is looking for moisture and most of the nutrients have been extended to germinate the seed. Some argue that microgreens don’t need nutrients. The idea is that everything is available for the plant until the true leaf begins to appear. While this is true, the plants is seeking moisture and minerals, normally in the soil, but when growing in coco coir or hydroponically (water) adding minerals from sea water or kelp is beneficial for the plant and is available to the consumer when eaten.
Test Crop
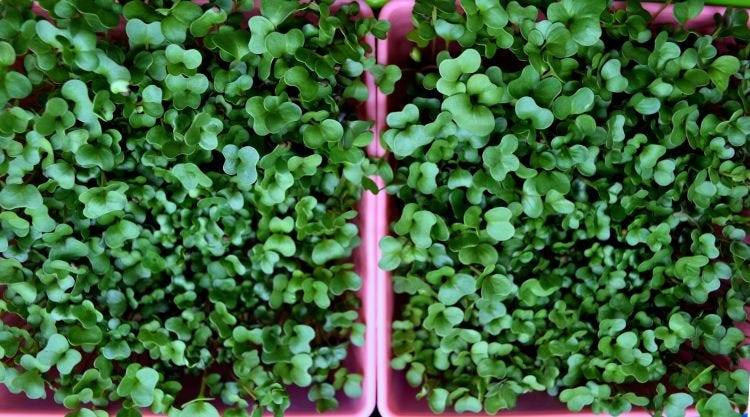
I just purchased the seeds from True Leaf Market, last week. I had just enough time to plant a “test crop” (shown above) before growing this 1020 tray of Brussels Sprouts. The “test crop” was grown with a different medium than the tray. The “test crop” was grown on a hemp fiber 5″ square mat from TerraFibre in my 5″ container from Bootstrap Farmer with a deep solid tray underneath. I placed the mats in their position in the 5″ trays and soaked them by adding water to the bottom tray and allowing it to soak the mats thoroughly before I sprinkle the seeds on the damp mat. (I had drained out any excess moisture prior to the seeding.) During germination the seeds were covered with another 5″ container to put them in blackout and I misted with water only from the top in order to keep the mat and ultimately the seeds kept moist for them to germinate.
Once the tray was under the lights I watered with Ocean Solution(2-0-3) mixed in water by watering into the bottom tray. I did this, just like the other microgreen trays, twice daily.
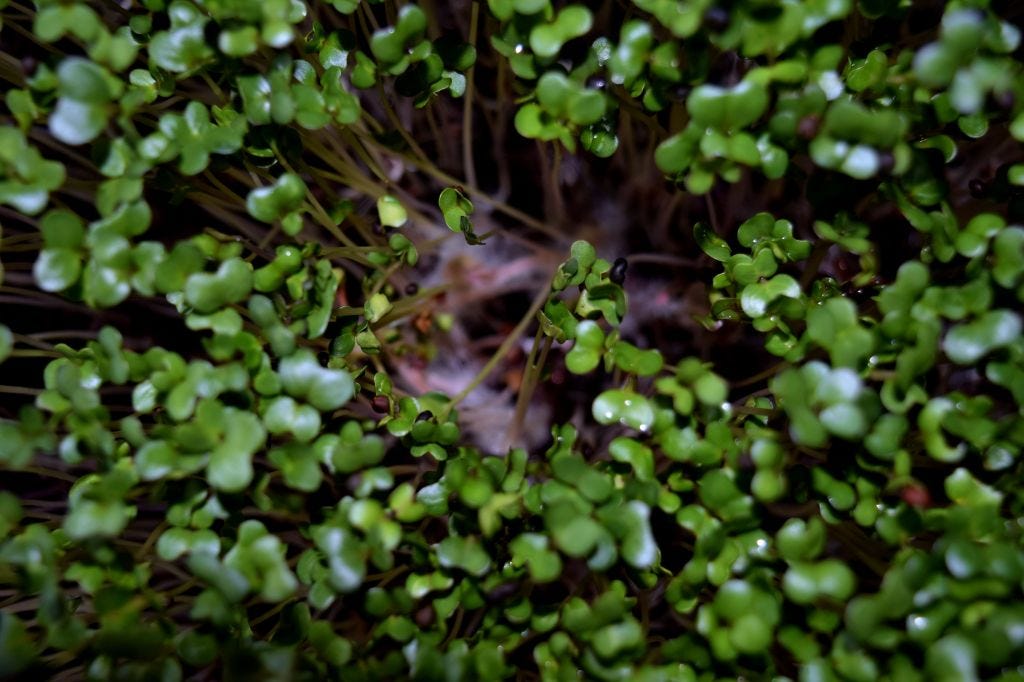
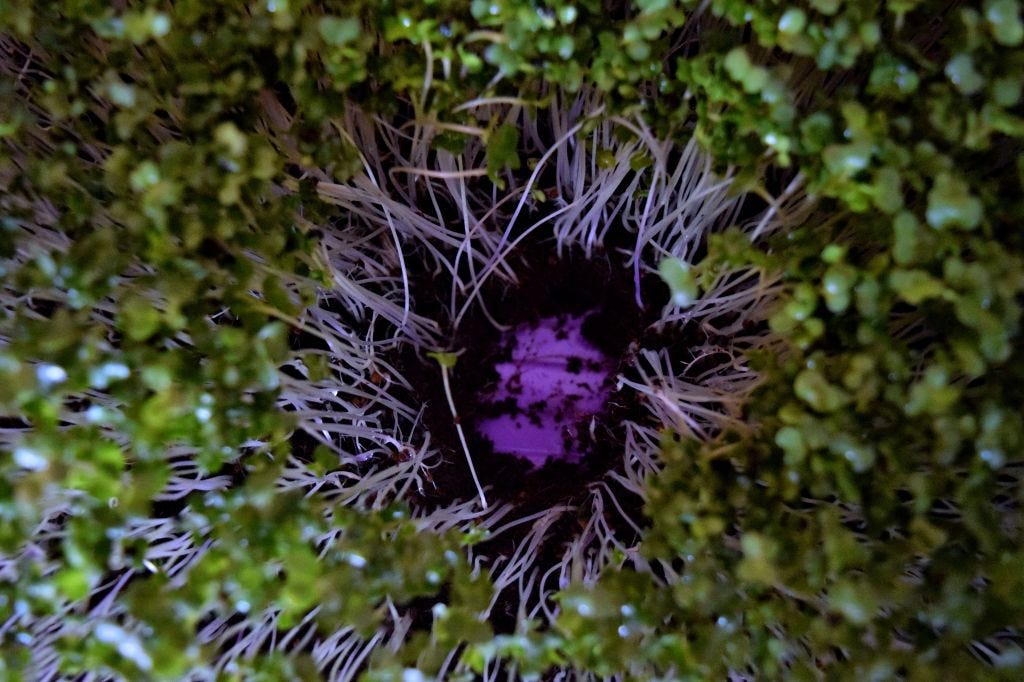
These seeds grew without any real problems of mold but I have noticed some low spots in the center on the “test crop”. Low spots can be trouble spots for mold since moisture tends to get trapped in these areas. This is why having fans and good air circulation is so important when growing.